

Watch "Get started with Netlify Serverless Functions" on egghead.io
This last little while I've been doing a fair amount of work on kentcdodds.com. One page that I've been working on is the contact page where you can request enterprise training, schedule an hour of my time for consulting, or even leave your own testimonial of my work (I'd love it if you did!).
My app is built with GatsbyJS which has quickly
become one of my favorite pieces of technology. Gatsby is a static site
generator, so it generates a bunch of HTML, CSS, and JavaScript files in a
directory called public in my project and it leaves it to me to get those
files on the World Wide Web for you and your loved ones to enjoy.
So how do I get those files up there on the internet? I use Netlify! I've LOVED Netlify for years. It's bonkers how quickly I can get a site up and running (with HTTPS) with Netlify and it's integration with GitHub is unmatched. I love it.
Great, so now I've got static files served ultra-fast on the internet with Netlify's CDN. But how do I make it so my contact form can actually send emails? You may not be aware of this, but web browsers are not able to send emails themselves. To do that, you need a server. I don't know about you, but managing servers and databases are among the top things on the list of stuff I do NOT enjoy about web development.
You may have heard of "Serverless" or "Lambda Functions" or "Azure Functions" etc. What's cool about this is you can write your server code without worrying about managing servers or paying to have them sit around waiting for requests all day long (which is particularly useful for a contact form like mine).
I remember years ago when those started getting popular, I tried them out a bit and was reminded why I don't enjoy working with backend/devops stuff. As cool as these functions were conceptually, I just didn't feel like I was smart enough to navigate the complexities of the offerings.
Luckily for us, almost exactly one year ago from the time I'm writing this, Netlify took the complexity of AWS Lambda functions and made it super simple (I think it's what they do best):

🚀Today we’re bringing #serverless all the way to the frontend. Introducing AWS Lambda functions that deploy along with your site Netlify: Develop & deploy the best web experiences in record time twitter.com/Netlify/status/976126036491386880

I want to give you a really quick intro to using Netlify to deploy server code in a way that is mind-blowingly straightforward to me.
How to use Netlify Lambda Functions
Before you get started, you'll need a GitHub account, a Netlify account, and a fresh repository. Once you've got the project locally on your computer, then you can start with the following steps:
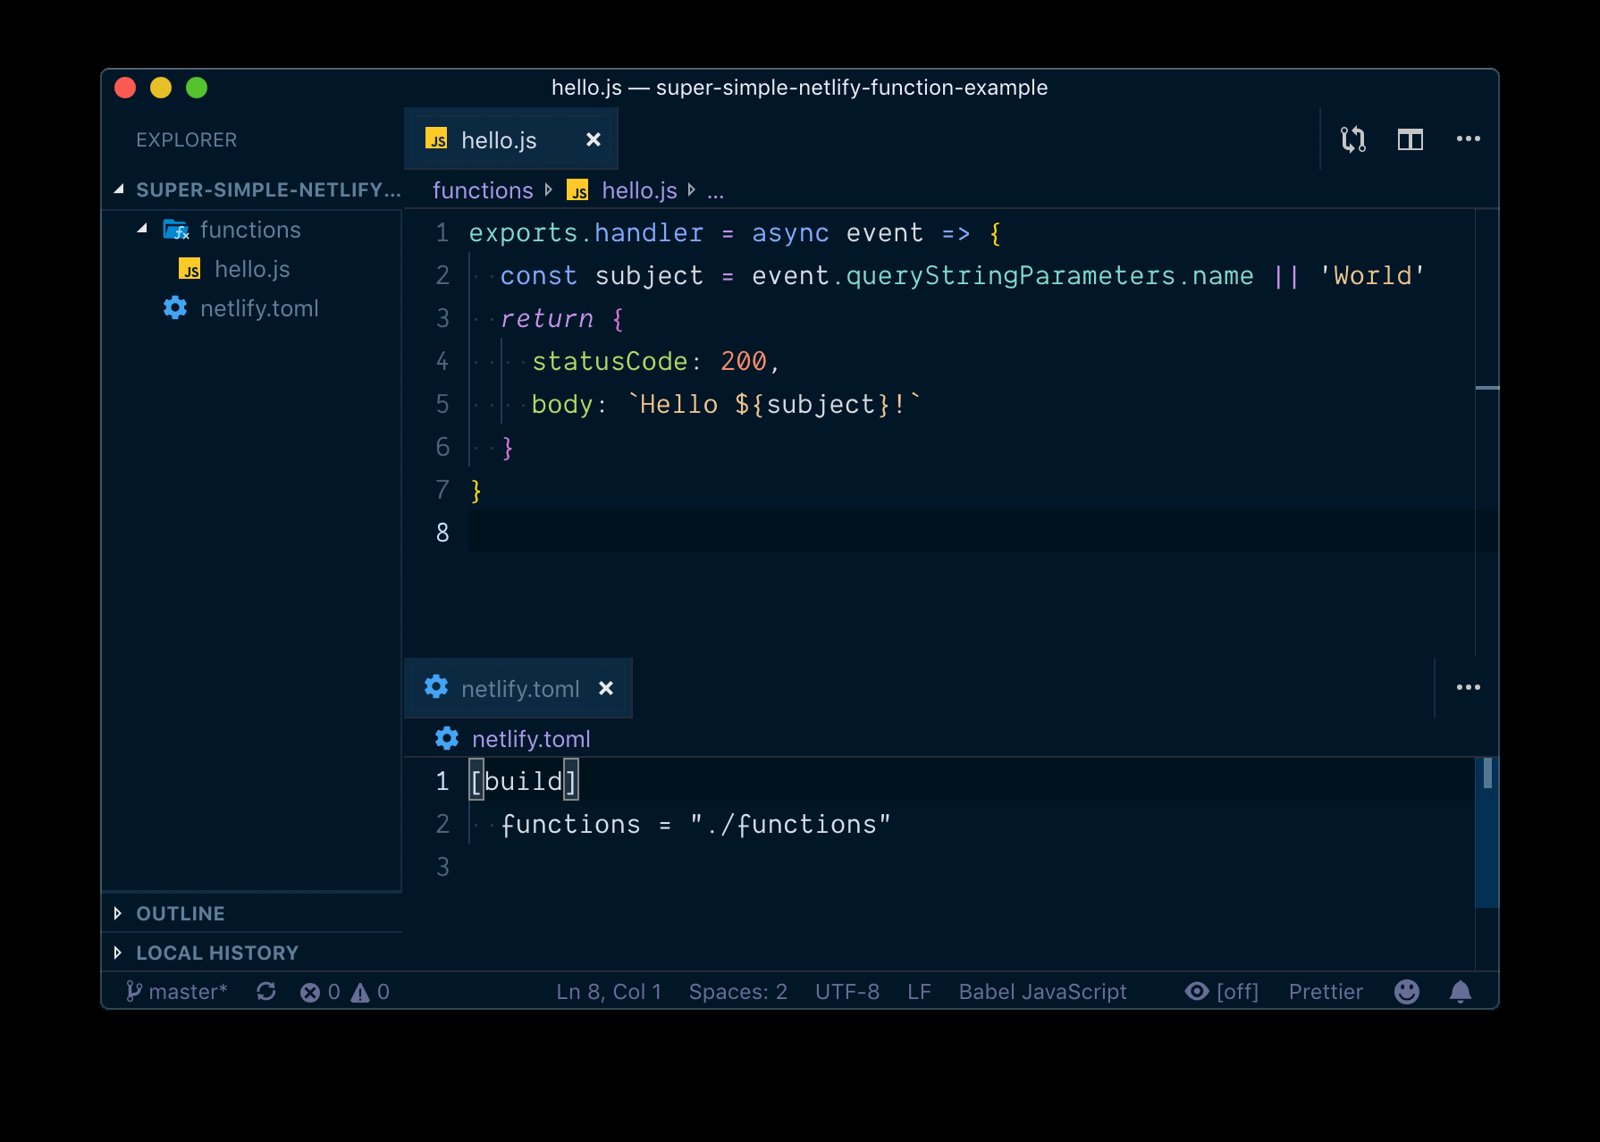
Step 1: Create a netlify.toml file
This file configures some stuff about our repository for netlify. Here's all you need for this to work:
[build]
  functions = "./functions"
All this is saying is: Hey Netlify, when you build my project, the functions are located in the "functions" directory.
Step 2: Create functions/hello.js
Now that we've told Netlify where to find our functions files, let's make one:
// functions/hello.js
exports.handler = async (event) => {
	const subject = event.queryStringParameters.name || 'World'
	return {
		statusCode: 200,
		body: `Hello ${subject}!`,
	}
}
Netlify uses AWS Lambda under the hood, so you can checkout documentation and
learning materials about creating AWS Lambda functions for what kind of code can
go in there. We'll start with something simple that returns a promise (note it's
an async function) which resolves to an object for the response we want for
this function. You can do all kinds of things in that function (like connect
with an SMTP mail server and send an email which is what I do in my contact
form).
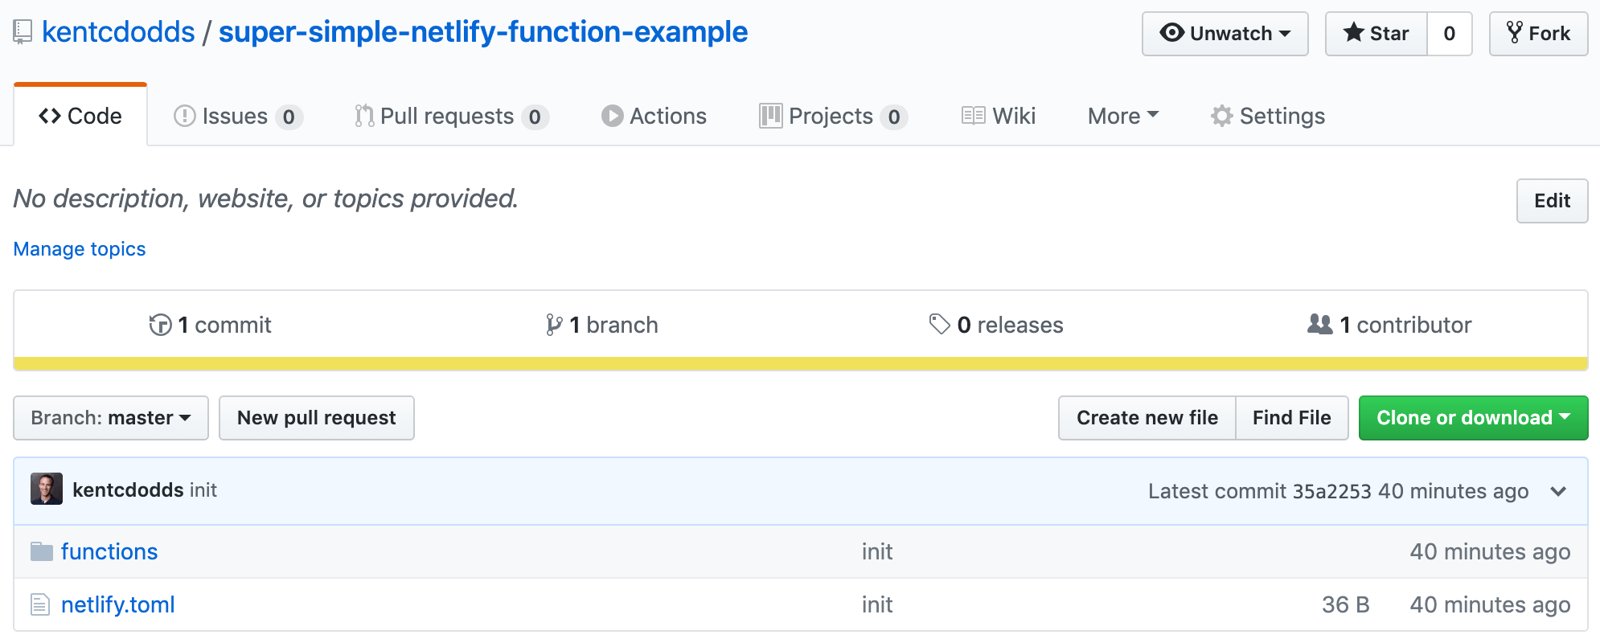
Step 3: Commit and push
Now you can just do: git add -A, then git commit -m 'init', and
git push -u origin master and you're set! Now let's go over to Netlify.
Step 4: Setup Netlify
Go to your netlify sites and click "New site from Git." From there you'll connect your Netlify account to your GitHub account and it'll show you a list of repositories. Search for the one you want and click on it.

Go ahead and leave the "Build command" and "Publish directory" fields empty and ignore the advanced options. Just click "Deploy site."
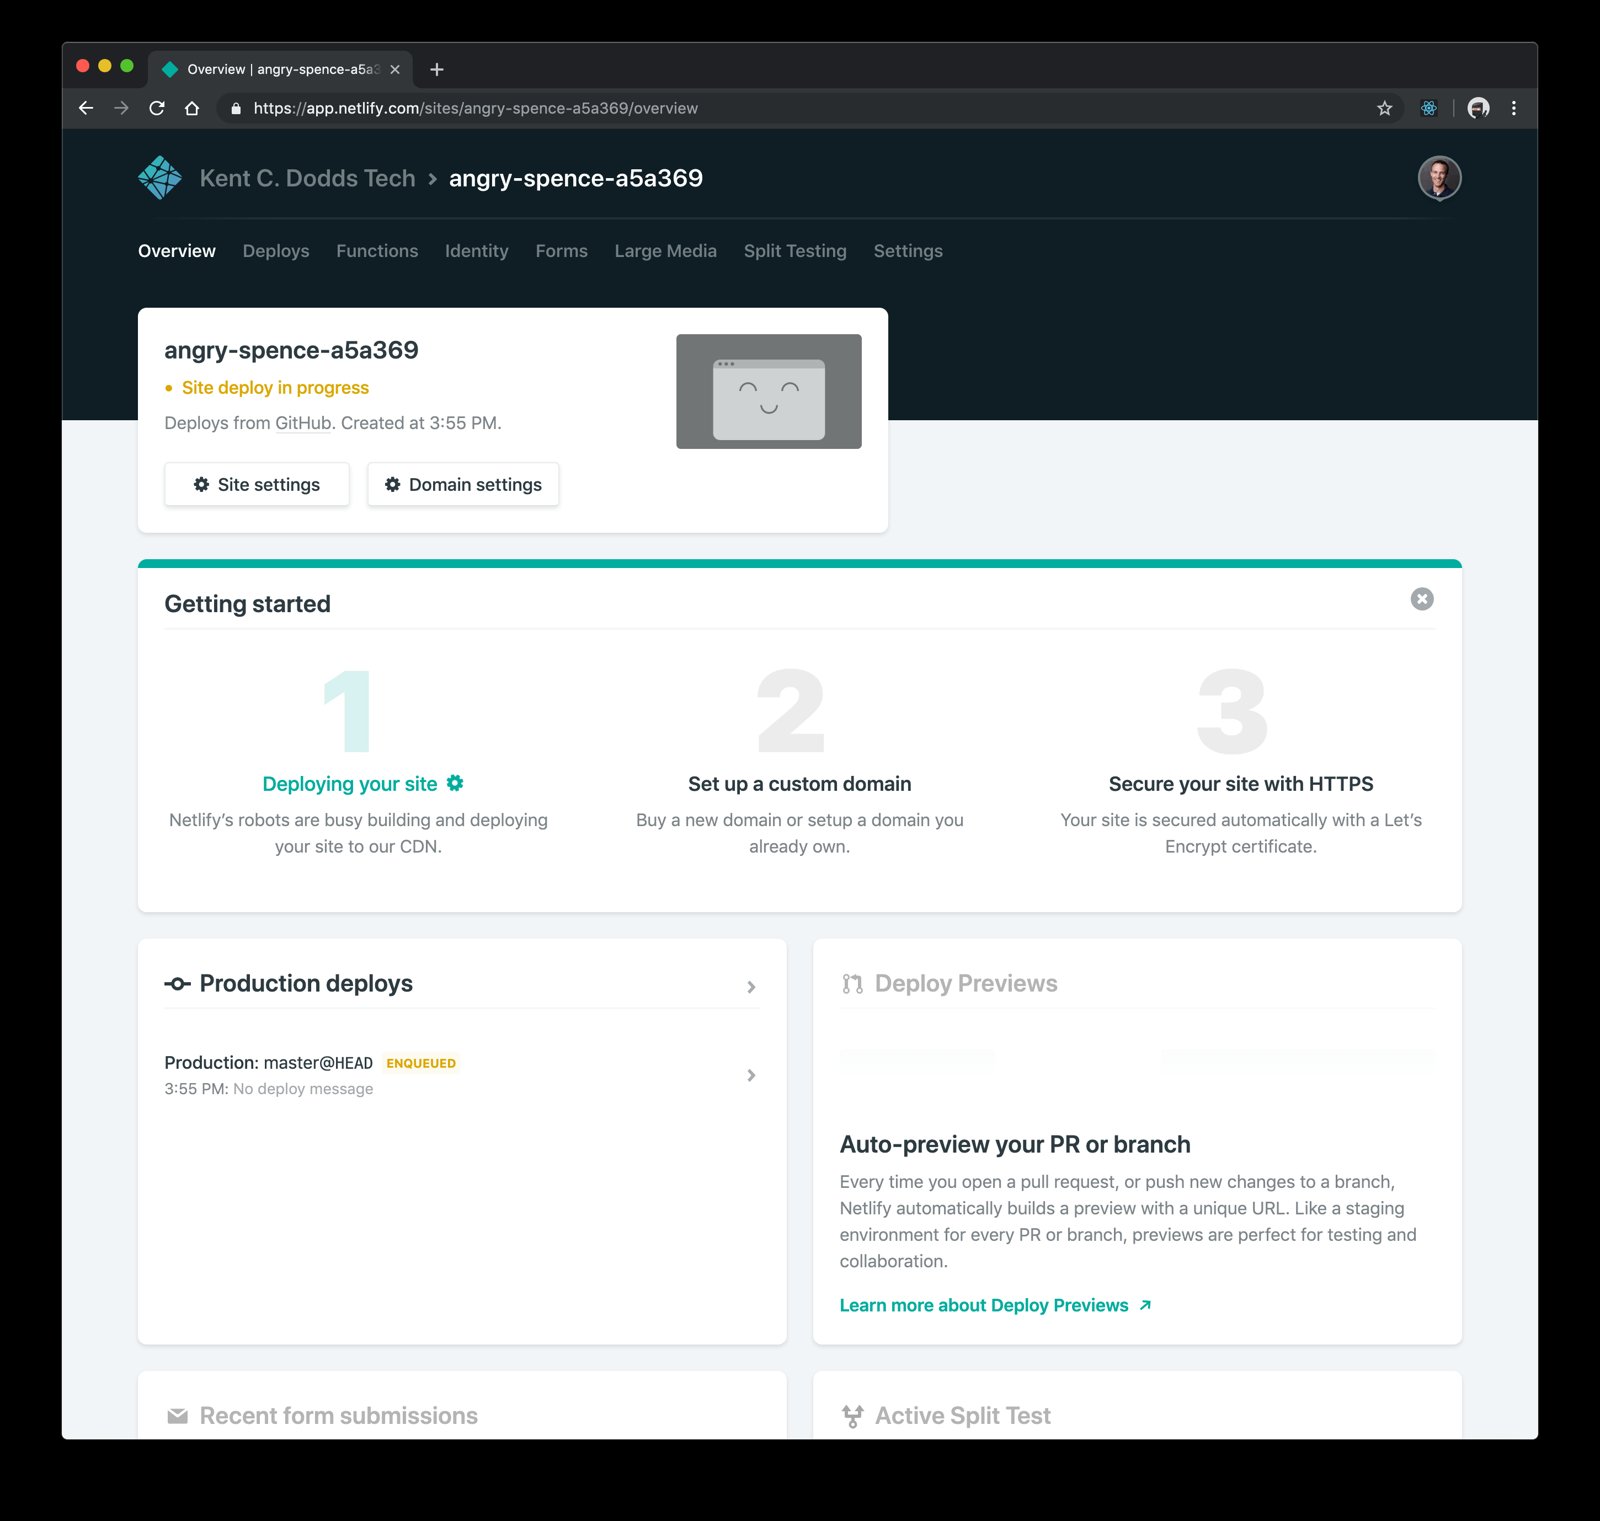
Now you're on the Overview page of your site. It should only take a few seconds to deploy your site. You can see info about that on the "Deploys" page. While you wait, you can edit the Site name to be something more memorable by clicking "Site settings."
Once the deploy is finished, you can go to the "Functions" page:
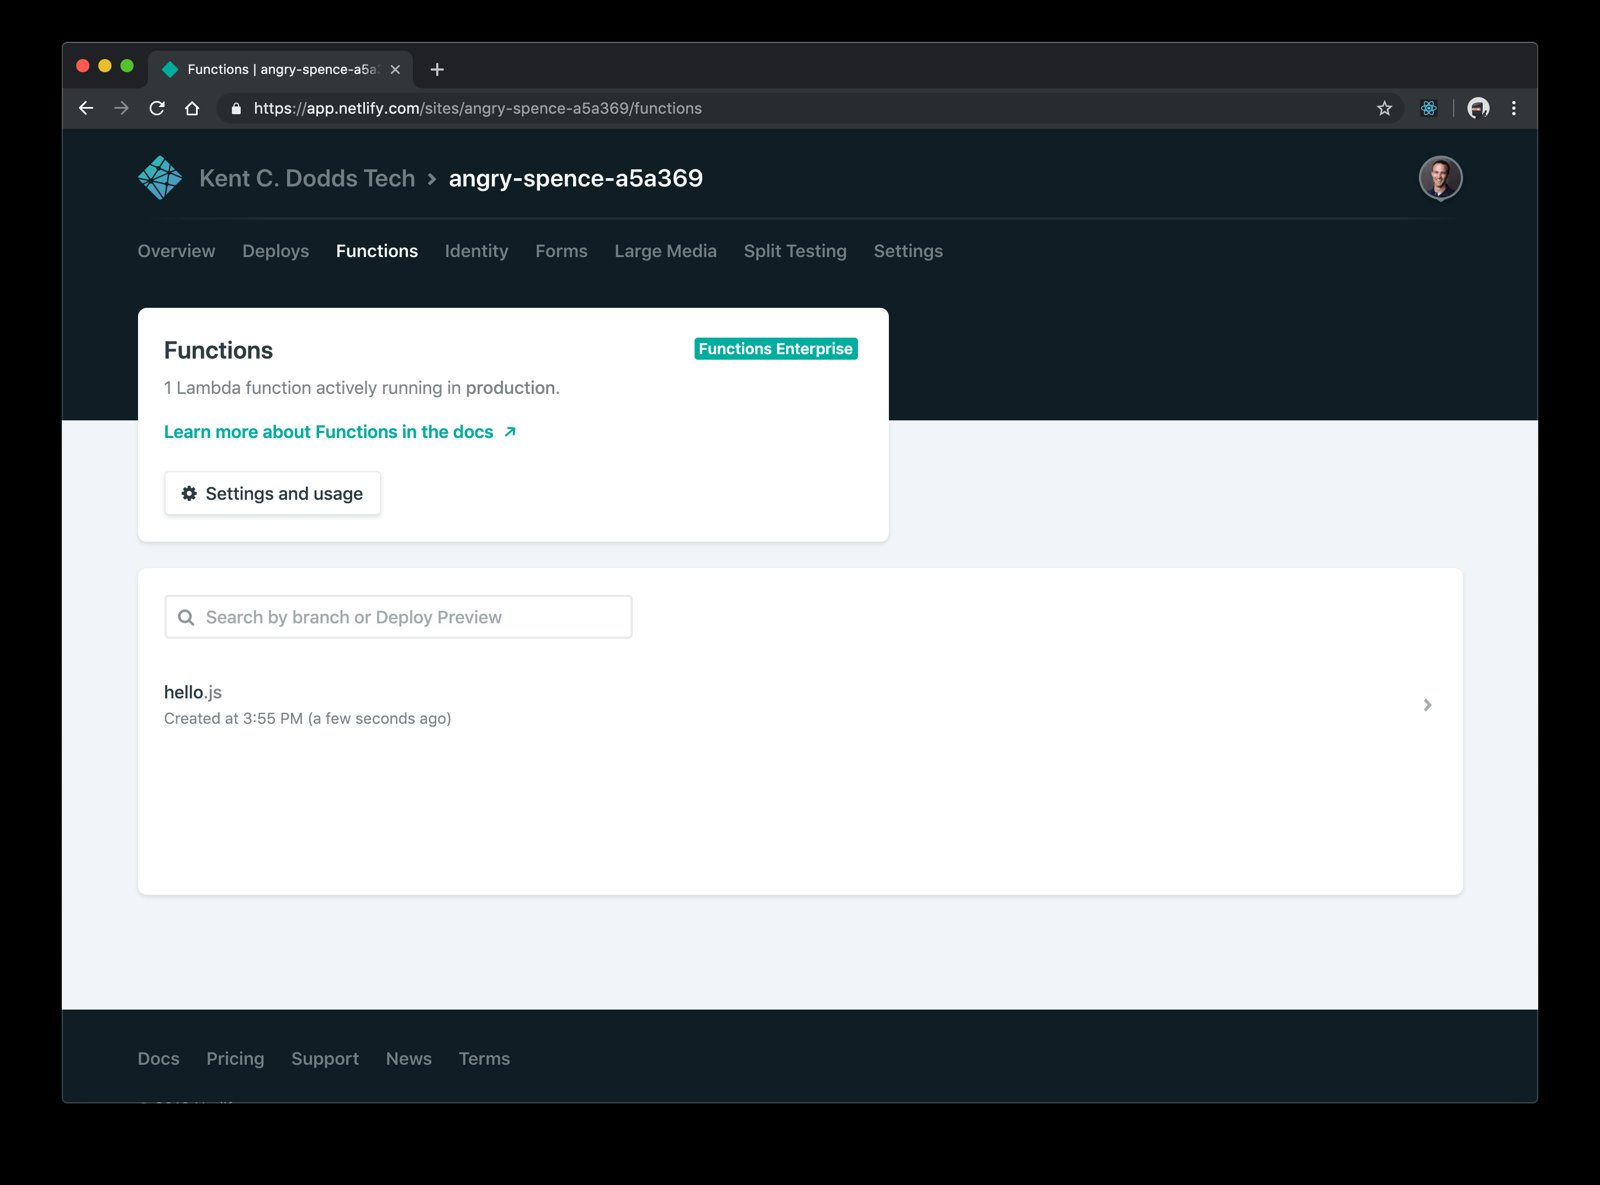
There you should see hello.js! If you click that it'll show you the function
log. Calls from your function to console.log should appear here with a
timestamp as well as a note for whenever your function is invoked:
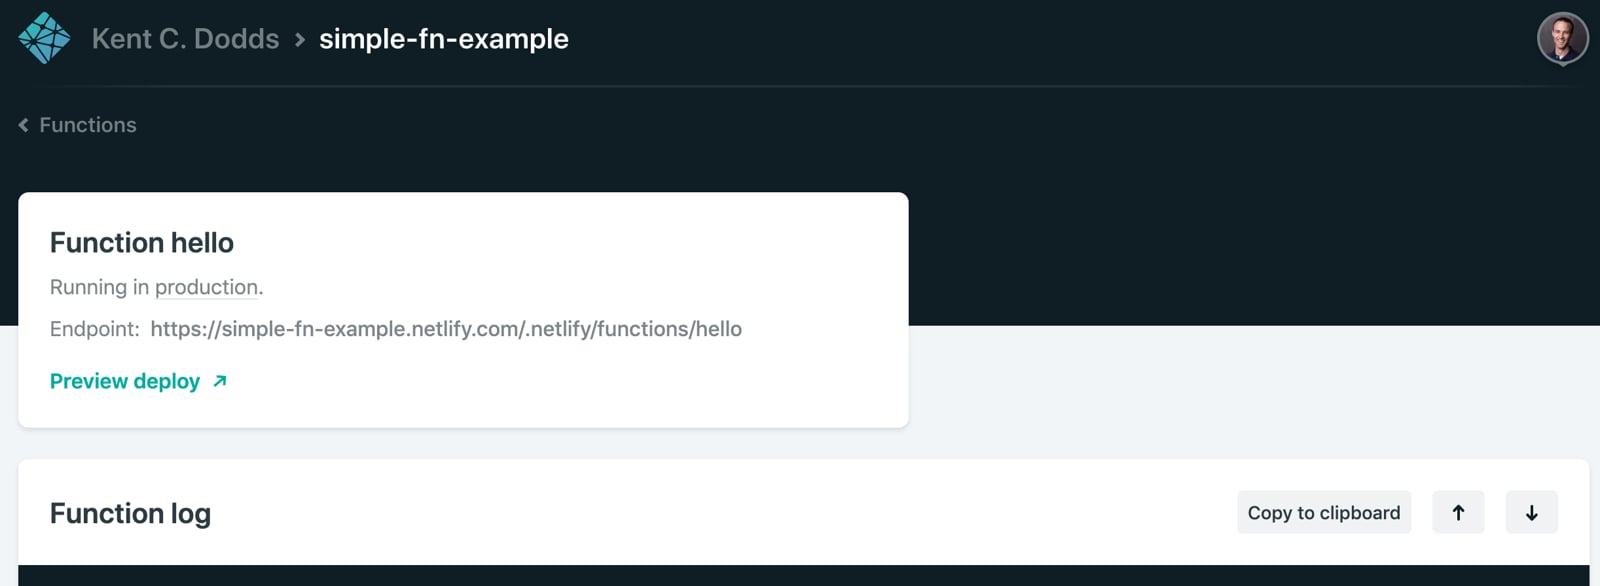
Checkout the "Endpoint" and it shows your function is available on the World
Wide Web at https://<your-site-name>.netlify.com/.netlify/functions/hello.
Really quick I just want to explain something. In netlify.toml we told Netlify
that it can find the JavaScript for our functions in the ./functions directory
(we could've called that whatever we wanted). Netlify takes each JavaScript file
in there and deploys it (as-is) to AWS lambda, then sets up an endpoint for
hitting that function for us under /.netlify/functions (this is not
configurable AFAIK).
Cool, so now we can hit that URL and boom, Hello Bob Ross!
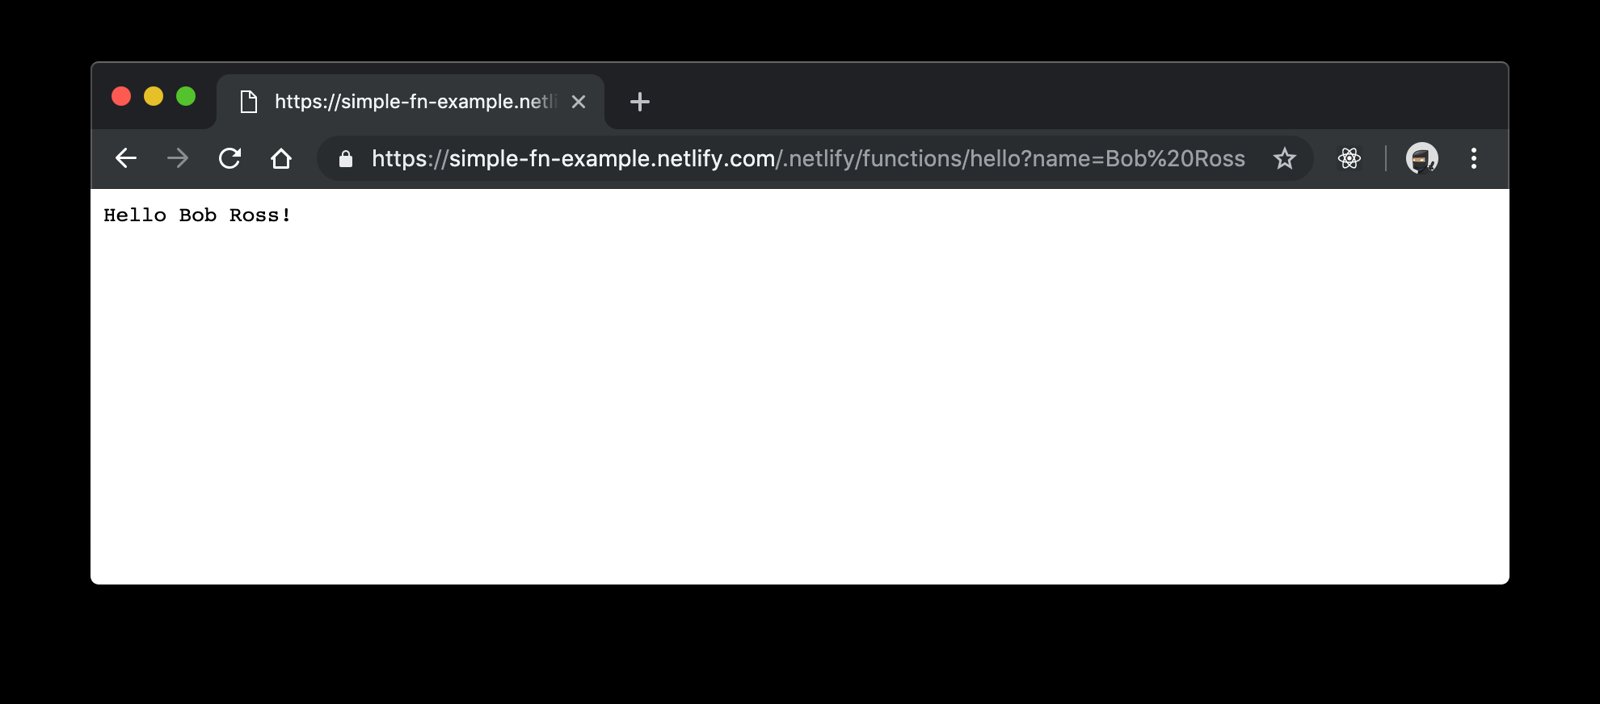
Wahoo!
Next steps
You can find my version of this project on GitHub and on Netlify.
One important thing to note is that Netlify will send only the files for our
functions to AWS and no more. This means that if you try to require something
from a local utils directory or node_modules you're out of luck.
Also, testing this locally is... not easy...
But wait! Netlify engineers have built
netlify-lambda to solve both
of these problems! I've taken the liberty of giving you an example of this same
function that uses netlify-lambda here
on GitHub.
Here are the main changes:
- Added a
package.jsonto configure npm/yarn to installnetlify-lambdaand createddevandbuildscripts. - Added a
.gitignoreto ignore the.netlifydirectory which is wherenetlify-lambdawill place our compiled functions. - Added a
commandline in ournetlify.tomlfile to have the build run the commandnpm run buildwhich will triggernetlify-lambdato build our function into a single file for delivery to AWS Lambda. - Updated the
functionsline in ournetlify.tomlfile to point to.netlify/functions/which is wherenetlify-lambdawill place our final built functions.
Everything else is the same, but now we can actually require different files!
Conclusion
Any time we need to make a change to our function, we simply make those changes, commit them to GitHub and Netlify will automatically update that on AWS Lambda. It's very fast and super empowering.
I love enabling technologies like this. I shouldn't have to build an entire backend with a database and server farm to allow you to send me Enterprise Training Inquiries, and thanks to Netlify, I don't have to. It's pretty slick!
Give it a try! I think you'll love it too.
P.S.
Also, Shawn mentioned that Netlify does have a Forms service built-in for contact forms like I have. I originally used that, but it doesn't actually send emails (you have to integrate with Zapier and it's an ok experience).
Also, while /.netlify/functions is not configurable, you can alias it to
anything with a redirect, including serving your entire site from a function
which is pretty legit.

](/media/w_955,h_1273,fit_cover,bg_e6e9ee/unsplash/photo-1477959858617-67f85cf4f1df "Business and Engineering alignment")
](/media/w_955,h_1273,fit_cover,bg_e6e9ee/unsplash/photo-1474718723952-48d2a016108f "useEffect vs useLayoutEffect")
](/media/w_955,h_1273,fit_cover,bg_e6e9ee/unsplash/photo-1617804309291-2f2d3734b471 "Super Simple Start to ESModules in Node.js")